 Pin it
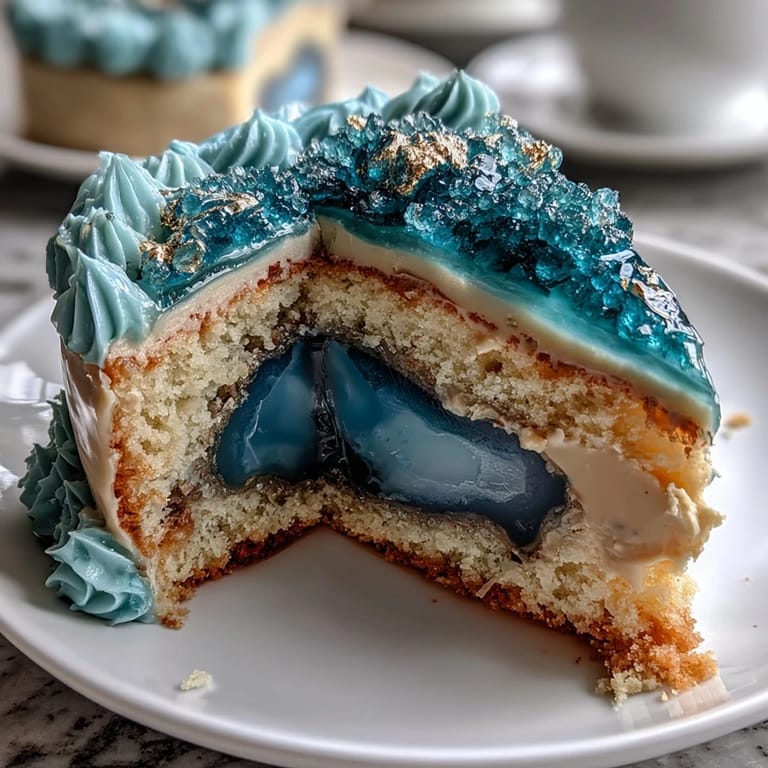
 Some of my favorite kitchen adventures begin with a creative spark and a little bit of pressure, and this graduation cake was exactly that kind of project. The invitation to make a centerpiece dessert for my cousin's big day landed when a drizzly spring afternoon gave me some rare hours at home. Smearing teal buttercream while gold dust shimmered on my fingertips turned the whole kitchen into a playful, glittering mess. Somewhere between spinning the cake turntable and brushing on those geode crystals, my playlist disappeared under the sound of laughter from the living room. There's something genuinely joyful about creating a cake that's meant to mark the start of someone's new chapter.
I vividly remember the bustle in the kitchen when we made this cake for my friend's art school graduation—a mix of nervous energy and eager hands ready to help. The geode decorating turned into a group affair, with everyone picking sugar crystals and arguing (lightheartedly) over where the gold should shine brightest.
Ingredients
- All-purpose flour: Get a tender but sturdy crumb; make sure to spoon and level for accuracy.
- Unsalted butter: Using butter at room temperature means effortless creaming and a lighter cake.
- Teal gel food coloring: This creates vibrant hues—just use a toothpick and add slowly for your perfect shade.
- Rock sugar crystals: These form the geode; stir in food coloring gently to avoid dissolving.
- Edible gold leaf or luster dust: This might feel extra, but it absolutely gives the cake that luxe finish—use a clean, dry paintbrush to apply.
- Simple syrup: For ultra-moist layers, a quick brush is all you need (especially helpful if you slightly overbake).
Tired of Takeout? 🥡
Get 10 meals you can make faster than delivery arrives. Seriously.
One email. No spam. Unsubscribe anytime.
Instructions
- Bake the Vanilla Cake Layers:
- Preheat the oven and let the familiar scent of vanilla fill your kitchen as you cream butter and sugar. Alternate adding dry ingredients and milk so the batter turns velvety, then divide into pans for an even bake.
- Mix Buttercream Magic:
- Whip the butter until it’s cloud-like, beat in sugar, and tint most of the frosting teal, but keep some plain—this part is oddly satisfying.
- Color Sugar for the Geode:
- Stir teal gel into rock sugar crystals until the color is bold, then let them air-dry so they don’t bleed into your cake.
- Assemble and Layer:
- Brush cooled cake with simple syrup, then stack with swoops of buttercream. Crumb coat in white, chill, and finish with luscious teal frosting, smoothing out the sides.
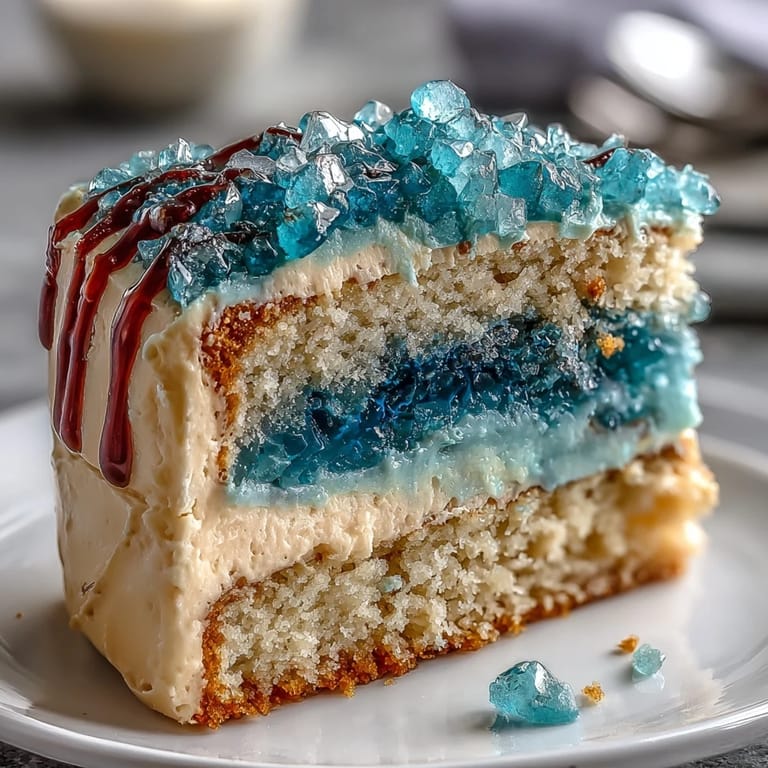
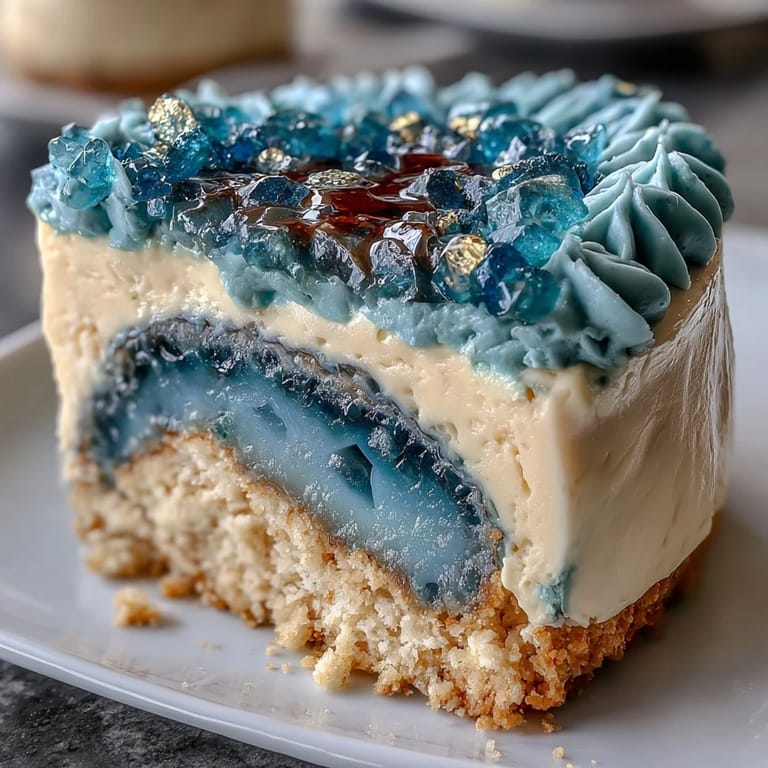
- Sculpt Your Geode:
- Use a sharp knife to carve a dramatic wedge, exposing the layers within. Smear on buttercream and press in teal crystals, placing lighter ones at the heart and darker crystals along the edge for depth.
- Finish with Gold Detail:
- Paint the edge of your geode with edible gold so it glimmers—don’t worry if it’s a bit messy, the uneven look mimics real minerals.
- Final Sparkle:
- Add any remaining gold, maybe a topper, and stand back to admire before the grad arrives.
 Pin it
 The real magic hit when we carried the finished cake into the living room and the whole crowd went quiet before erupting in applause. It was one of those rare moments when a dessert turns an ordinary gathering into a celebration none of us will forget.
Troubleshooting Sugar Crystals
If your sugar crystals come out clumpy, it usually means they got too wet during coloring or didn’t have enough time to dry. I found that spreading them on parchment paper and letting them sit while I finished the buttercream solves most problems, and the crystals actually pop more vibrantly this way.
How to Carve the Geode Without Fear
I used to second-guess every cut, but then I realized a geode’s beauty lies in its imperfection. Trust your eye, wield your serrated knife with confidence, and remember: you can always patch up mistakes with extra buttercream or sugar crystals (no one ever complains about more sugar).
Serving & Storing Like a Pro
To get neat slices, dip a clean serrated knife in hot water before each cut for ultra-smooth edges. Leftovers keep beautifully in an airtight container in the fridge for up to three days, and you’ll still get a stunning slice the next day.
- Let the cake come to room temperature before serving for the best texture.
- Add final gold accents just before presenting the cake so they gleam brightest.
- Always check your sugar and food color labels for allergens if cooking for guests.
 Pin it
 However you decorate it, this cake will turn “just dessert” into a centerpiece worth celebrating. Here’s to making graduation (or any milestone) a little more unforgettable.
Recipe FAQ
- → How do I achieve the best geode effect?
Use a mix of light and dark teal-tinted sugar crystals when filling the carved slice. Finish with metallic gold brushwork for depth and realism.
- → Can other cake flavors be used?
Yes, you can infuse the batter with lemon, almond, or other extracts to suit your taste. Just keep the crumb sturdy for decorating.
- → How do I prevent the cake from drying out?
Brush each cake layer with simple syrup before layering. This adds moisture and helps preserve freshness during assembly.
- → Is the gold decoration safe to eat?
Always choose edible gold leaf or luster dust labeled safe for consumption. Avoid non-edible metallic decorations for food safety.
- → Can the sugar crystals be made in advance?
Yes, you can tint and dry the sugar crystals ahead. Store them in an airtight container until ready to decorate the cake.
- → What are good pairing suggestions for serving?
This elegant cake pairs beautifully with sparkling wine or lemonade, perfect for festive celebrations and parties.